ImageView的scaleType

1. scaleType存在的形式

1) CENTER

2) CENTER_CROP

3) CENTER_INSIDE

4) FIT_CENTER

5) FIT_END

6) FIT_START

7) FIT_XY

8) MATRIX

2.Google的官方解释以及我的个人分析

type google****官方说明 我的解释
CENTER Center the image in the view, but perform no scaling. 先把当前的图片放置到ImageView的中间,不执行缩放,如果图片小,那么就会有空白区域,如果图片大,那么便会被裁减
CENTER_CROP Scale the image uniformly (maintain the image’s aspect ratio) so that both dimensions (width and height) of the image will be equal to or larger than the corresponding dimension of the view (minus padding). 先把当前的图片放置到ImageView的中间,执行缩放,将图片的宽度和高度按照相同比例缩放到宽度大于或者等于ImageView的宽度,同时高度大于或者等于ImageView的高度
CENTER_INSIDE Scale the image uniformly (maintain the image’s aspect ratio) so that both dimensions (width and height) of the image will be equal to or less than the corresponding dimension of the view (minus padding). 1. 先把当前的图片放置到ImageView的中间; 2. 如果图片小于ImageView的大小,不执行缩放,原样显示; 3. 否则开始缩放,将图片的宽度和高度按照相同比例缩放到宽度小于或者等于ImageView的宽度,同时高度小于或者等于ImageView的高度(此处的高度和宽度指的是内容的大小width/height-padding)
FIT_CENTER Scale the image using CENTER. CENTER: Compute a scale that will maintain the original src aspect ratio, but will also ensure that src fits entirely inside dst. At least one axis (X or Y) will fit exactly. The result is centered inside dst. 1.保持图片的宽高比 2.将图片放置到ImagetView的中心,然后进行向外按比例放大或者缩小,直到一个方向已经适应
FIT_END Scale the image using END END: Compute a scale that will maintain the original src aspect ratio, but will also ensure that src fits entirely inside dst. At least one axis (X or Y) will fit exactly. END aligns the result to the right and bottom edges of dst. 1.保持图片的宽高比 2.将图片放置到ImagetView的右下角,然后进行向外按比例放大或者缩小,直到一个方向已经适应
FIT_START Scale the image using START START: Compute a scale that will maintain the original src aspect ratio, but will also ensure that src fits entirely inside dst. At least one axis (X or Y) will fit exactly. START aligns the result to the left and top edges of dst. 1.保持图片的宽高比 2.将图片放置到ImagetView的左上角,然后进行向外按比例放大或者缩小,直到一个方向已经适应
FIT_XY Scale the image using FILL FILL: Scale in X and Y independently, so that src matches dst exactly. This may change the aspect ratio of the src. 1.不保持图片的宽高比 2.然后进行向外按比例放大或者缩小,直到一个方向已经适应
MATRIX Scale using the image matrix when drawing.

3 数据测试

为了表明测试的准确性,我准备了两组数据,一组是图片的分辨率高于ImageView自身的宽高,另外一组是图片的分辨率低于ImageView自身的宽高,这样才具有测试的完整性。

第一组: 图片的分辨率高于ImageView****自身的宽高

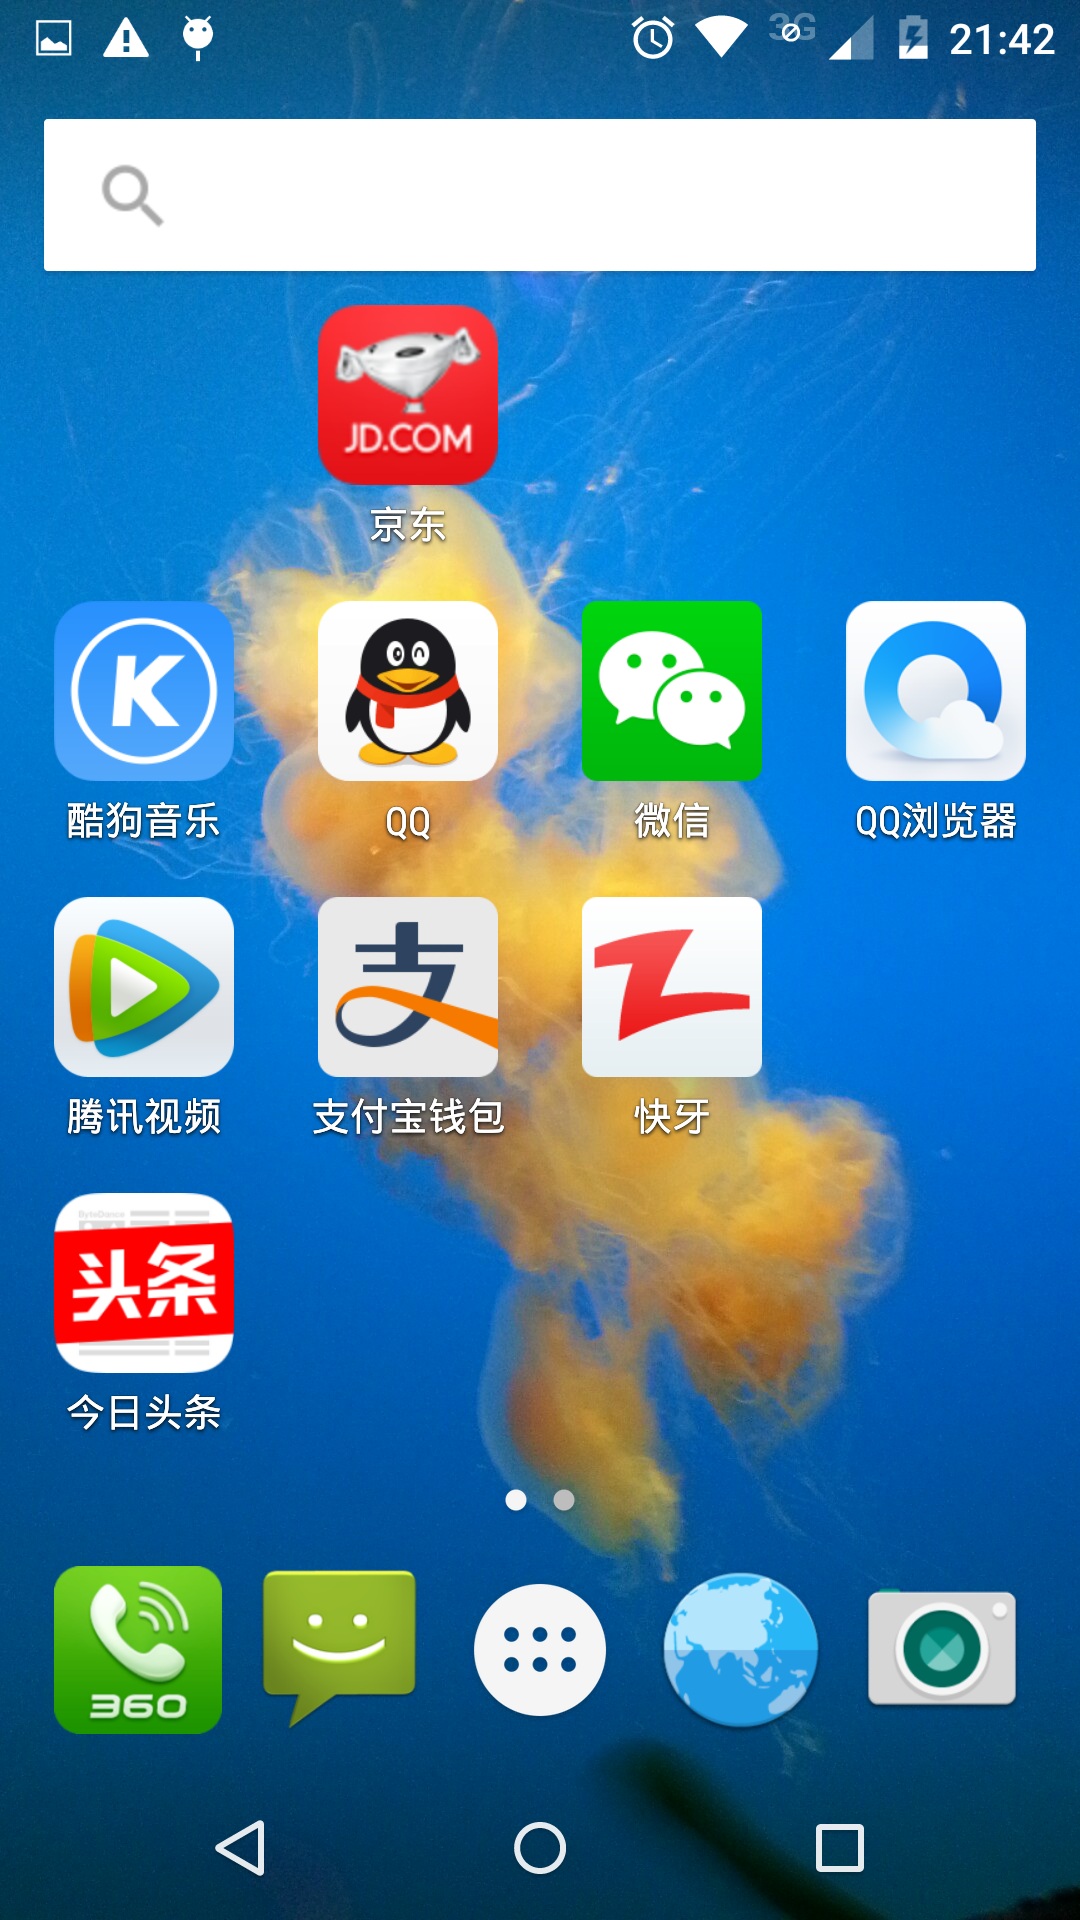
原图: 屏幕截图: 尺寸:1080*1920 即1080p的屏幕截图

img

将各组数据分别做显示,为了表示特点,将ImageView的背景设置为黑色,ImageView的大小设置为100dp*100dp

img

**** 1 2 3
1 center centerCrop centerInside
2 fitCenter fitEnd fitXY
3 fitStart matrix

咱们逐个开始看

  1. CENTER : 首先将图片放置到了中间,然后能够显示多少,就显示多少,图片不做处理,因而图片只是显示了中间支付宝钱包快牙图标的一部分
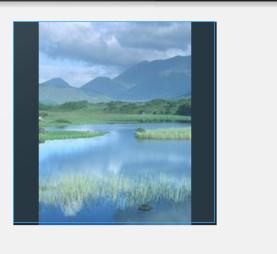
  2. CENTERCROP : 同样先将图片放置到了中间,然后开始等比例伸缩图片,直到两边有一边适配了边界,由于图片高度大于宽度,因而首先高度适配了,但是此时宽度还够不着边界,不符合上面表格的要求:高度和宽度要均大于等于对应ImageView的高度和宽度,因而要继续伸缩至宽度达到边界,所以宽度可以显示完整,而高度显示不完整
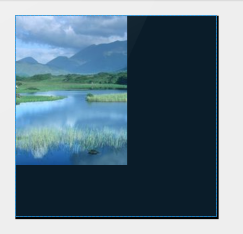
  3. CENTERINSIDE : 同样现将图片放置到了中间,将图片伸缩(如果图片小于ImageView的宽高,那么是不伸缩的),直到两侧同时小于或者等于图片的边界,由于宽度会先适配,高度后适配,因而两侧会显示出黑色的背景
  4. FIT_CENTER : 将图片放置到ImageView的中间,保持图片的宽高比,图片由小变大一步一步扩大,直到一个方向已经适配,由于高度大于宽度,因而高度会先适配,故两侧会出现黑色的背景
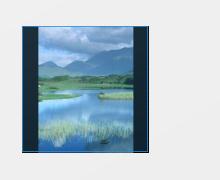
  5. FIT_END :将图片放置到ImageView的右下角,保持图片的宽高比,图片由小变大一部一部扩大,直到一个方向已经适配,高度大于宽度,高度先适配,故左侧出现黑色背景
  6. FIT_XY : 不保持图片的宽高比进行伸缩,从ImageView的中心,由小到大,一部一部扩大,直到两个方向都已经适配
  7. MATRIX : 不熟悉,不做解释

第二组测试数据: 图片分辨率小于ImageView大小的各种数据

原图: 分辨率: 165*220

img

ImageView大小: 200dp*200dp

类型以及结果:

  1. CENTER:

img

  1. CENTER_CROP: 同样: 由于会缩放,图片高度大于宽度,因而最终的效果是宽度填充满,而高度上部分显示不出来

img

  1. CENTER_INSIDE : 刚才已经提到,如果图片小于屏幕的大小,那么CENTER_INSIDE是不会做缩放的

img

此时可能有人会提出疑问,假如说图片一侧大于屏幕的大小,而另外一侧小于屏幕的大小,那么会怎么处理呢?处理的方式还是要符合原则,最终的结果是两侧都要小于等于屏幕对应的尺寸,就是在ImageView的大小内,显示完整这个图片,并且是按照等比例缩放的

,以这个图片为例:

用Nexus5(分辨率为10801920)做测试,假如说ImageView的大小为60dp60dp,Nexus5下的大小为 : 180px*180px

而图片的大小 :165px*220px,这时图片的高度已经超过了ImageView的高度,所以会将高度缩放到ImageView的大小,因而出现如下的效果

img

  1. FIT_CENTER :

img

  1. FIT_END:

img

  1. FIT_START

img

  1. MATRIX

img

Android APP性能分析工具大全

官方工具

TraceView

简介

TraceView是Android平台配备一个很好的性能分析工具,它可以通过图形化的方式让我们了解我们要跟踪的程序的性能,并且能具体到方法。用来展示和分析方法的执行时间。

文档

https://developer.android.com/studio/profile/traceview

作用

分析方法调用栈以及其执行时间, 优化方法执行。可以获取单次执行最耗时的方法;

StrictMode

简介

StrictMode严格模式,主要用来检测程序中违例情况的开发者工具。一般用来检测主线程中的耗 时操作和阻塞. 开启StrictMode后, 如果线程中做一些诸如读写文件, 网络访问等操作, 将会在Log console输出一些警告, 警告信息包含Stack Trace来显示哪个地方出了问题。

文档

https://developer.android.com/reference/android/os/StrictMode

作用

主要用来做主线程优化分析

Systrace

简介

Systrace是分析Android性能问题的神器,Google IO 2017上更是对其各种强推. 是分析卡顿掉帧问题核心工具,只要能提供卡顿现场,systrace就能很好定位问题,但是有一定上手难度,所以会稍微花比较多的篇幅来学习,当然systrace配合traceView使用效果更佳,之后也会介绍traceView。

文档

https://developer.android.com/studio/profile/systrace

https://developer.android.com/studio/profile/systrace-walkthru

作用

作用很多, 个人主要用来分析UI的绘制时间, 结合Hierarchy Viewer来提升UI性能;也可以用来发现耗时操作;

Hierarchy Viewer

简介

主要是来查看布局层级,较少不必要的冗余的View。

文档

https://developer.android.com/studio/profile/hierarchy-viewer.html

https://developer.android.com/studio/profile/hierarchy-viewer-walkthru.html

作用

用来做View层级分析, 可以分析出View Tree中的性能阻塞点, 以便对症下药, 提升布局性能.

AndroidStudio Profiler

简介

Android Studio 3.0 采用全新的 “Android Profiler” 窗口取代 Android Monitor 工具。 这些全新的分析工具能够提供关于应用 CPU、内存和网络 Activity 的实时数据。 您可以执行基于样本的函数跟踪来记录代码执行时间、采集堆转储数据、查看内存分配,以及查看网络传输文件的详情。

文档

https://developer.android.com/studio/profile/cpu-profiler.html

https://developer.android.com/studio/profile/memory-profiler.html

https://developer.android.com/studio/profile/network-profiler.html

作用

使用 CPU Profiler 检查 CPU Activity 和函数跟踪

利用 Memory Profiler 检查 Java 堆和内存分配

利用 Network Profiler 检查网络流量

第三方工具

Battery Historian(Google)

简介

BatteryStats是安卓框架中包含的一个工具,用于在设备上收集电池数据。您可以使用ADB将收集到的电池数据转储到您的开发机器中,并创建一个可以使用电池历史记录分析的报告。Battery Historian将报告从BatteryStats转换为HTML可视化,您可以在浏览器中查看。

文档

https://developer.android.com/studio/profile/battery-historian#how-to

https://github.com/google/battery-historian

作用

用来做电量使用分析.

Emmagee(网易)

简介

Emmagee是一款实用,方便的性能测试工具,适用于指定的Android App,它可以监控CPU,内存,网络流量,电池电流和状态(某些设备不受支持)。它还提供了一些很酷的功能,例如自定义收集数据的间隔,在浮动窗口中呈现实时进程状态等等。

文档

https://github.com/NetEase/Emmagee

作用

比官方工具更适合国人使用来做App的整体性能分析.

leakcanary(Square)

简介

类似与App探针的内存泄露监测工具.

文档

https://github.com/square/leakcanary

作用

集成到App中, 用来做内存问题预防最好不过了.

AndroidDevMetrics

简介

一个library, 用来检测Activity生命周期执行性能, Dagger2注入性能以及帧率性能的工具.

文档

https://github.com/frogermcs/AndroidDevMetrics

作用

如果你的应用使用的Dagger2, 这个就比较必要了.

Trepn Profiler

简介

六个快速加载的分析预设
覆盖显示在正在分析的应用程序顶部的屏幕上
配置您的设备或单个应用
显示支持的设备上的电池电量
并非所有设备都能够报告准确的电池电量。请参阅Trepn论坛中支持的设备列表。
查看CPU和GPU频率和利用率
GPU频率和利用率仅适用于基于Snapdragon(骁龙芯片)的设备。
显示网络使用情况(手机和Wi-Fi)
适用于大多数Android智能手机和平板电脑(Android 4.0及更高版本)
高级模式,用于手动选择数据点并保存数据以供以后分析

下载路径:

https://developer.qualcomm.com/download/software

App Tune-up kit

简介

也是高通开发的一款性能检测工具,可让开发人员在60秒内分析和分析任何Android应用程序。可以从CUP,GPU,功耗,发热量以及移动网络数据五个方面来评测一个app的性能;

下载地址:

https://developer.qualcomm.com/download/software

WakeLock Detector

简介

对手机的运行状态进行探测记录,能统计那些应用触发了CPU运行消耗cpu,那些应用触发了屏幕点亮。同时还可以对运行时间进行统计,可以查看应用内使用细节。

GSam Battery Monitor

简介

检测手机电池电量的消耗去向,能够用折线图进行统计展示。

腾讯GT

简介

GT(随身调)是APP的随身调试平台,它是直接运行在手机上的“集成调试环境”(IDTE,Integrated Debug Environment)。

利用GT,仅凭一部手机,无需连接电脑,即可对APP进行快速的性能测试(CPU,内存,流量,电量,帧率/流畅度等等),开发日志的查看,崩溃日志查看,网络数据包的抓取,APP内部参数的调试,真机代码耗时统计等。

Android版由一个可直接安装的GT控制台APP和GT SDK组成,GT控制台可以独立安装使用,SDK需要嵌入被调试的应用,并利用GT控制台进行信息展示和参数修改。

文档

https://github.com/Tencent/GT

Lint

简介

Android Lint是ADT 16(和工具16)中引入的一种新工具,可以扫描Android项目源中的潜在错误。

以下是它查找的错误类型的一些示例:

缺少翻译(没用上的翻译)比如国际化未被翻译的字段值
布局性能问题(旧layoutopt工具用于查找的所有问题,以及更多)
未使用的资源
数组大小不一致(在多个配置中定义数组时)
可访问性和国际化问题(硬编码字符串,缺少内容描述等)
图标问题(如缺少密度,重复图标,错误尺寸等)
可用性问题(例如未在文本字段中指定输入类型)

文档

http://tools.android.com/tips/lint

Android常用工具方法

代码类

判断手机是否root

1
2
3
4
5
6
7
8
9
10
11
12
13
14
15
16
17
18
19
20
21
22
23
24
25
26
27
28
29
30
31
32
33
public class RootUtil {
public static boolean isDeviceRooted() {
return checkRootMethod1() || checkRootMethod2() || checkRootMethod3();
}

private static boolean checkRootMethod1() {
String buildTags = android.os.Build.TAGS;
return buildTags != null && buildTags.contains("test-keys");
}

private static boolean checkRootMethod2() {
String[] paths = { "/system/app/Superuser.apk", "/sbin/su", "/system/bin/su", "/system/xbin/su", "/data/local/xbin/su", "/data/local/bin/su", "/system/sd/xbin/su",
"/system/bin/failsafe/su", "/data/local/su", "/su/bin/su"};
for (String path : paths) {
if (new File(path).exists()) return true;
}
return false;
}

private static boolean checkRootMethod3() {
Process process = null;
try {
process = Runtime.getRuntime().exec(new String[] { "/system/xbin/which", "su" });
BufferedReader in = new BufferedReader(new InputStreamReader(process.getInputStream()));
if (in.readLine() != null) return true;
return false;
} catch (Throwable t) {
return false;
} finally {
if (process != null) process.destroy();
}
}
}

获取设备唯一Id

具体可参考blog

1
2
3
4
5
6
7
8
9
10
11
12
13
14
15
16
17
18
19
20
21
22
23
24
25
26
27
28
29
30
31
32
33
34
35
36
37
38
39
40
41
42
43
44
45
46
47
48
49
50
51
52
53
54
55
56
57
58
59
60
61
62
63
64
65
66
67
68
69
70
71
72
73
74
75
76
77
78
79
80
81
82
83
84
85
86
87
88
89
90
91
92
import android.content.Context;  
import android.content.SharedPreferences;
import android.provider.Settings.Secure;
import android.telephony.TelephonyManager;

import java.io.UnsupportedEncodingException;
import java.util.UUID;

public class DeviceUuidFactory {

protected static final String PREFS_FILE = "device_id.xml";
protected static final String PREFS_DEVICE_ID = "device_id";
protected static volatile UUID uuid;

public DeviceUuidFactory(Context context) {
if (uuid == null) {
synchronized (DeviceUuidFactory.class) {
if (uuid == null) {
final SharedPreferences prefs = context
.getSharedPreferences(PREFS_FILE, 0);
final String id = prefs.getString(PREFS_DEVICE_ID, null);
if (id != null) {
// Use the ids previously computed and stored in the
// prefs file
uuid = UUID.fromString(id);
} else {
final String androidId = Secure.getString(
context.getContentResolver(), Secure.ANDROID_ID);
// Use the Android ID unless it's broken, in which case
// fallback on deviceId,
// unless it's not available, then fallback on a random
// number which we store to a prefs file
try {
if (!"9774d56d682e549c".equals(androidId)) {
uuid = UUID.nameUUIDFromBytes(androidId
.getBytes("utf8"));
} else {
final String deviceId = ((TelephonyManager)
context.getSystemService(
Context.TELEPHONY_SERVICE)
.getDeviceId();
uuid = deviceId != null ? UUID
.nameUUIDFromBytes(deviceId
.getBytes("utf8")) : UUID
.randomUUID();
}
} catch (UnsupportedEncodingException e) {
throw new RuntimeException(e);
}
// Write the value out to the prefs file
prefs.edit()
.putString(PREFS_DEVICE_ID, uuid.toString())
.commit();
}
}
}
}
}

/**
* Returns a unique UUID for the current android device. As with all UUIDs,
* this unique ID is "very highly likely" to be unique across all Android
* devices. Much more so than ANDROID_ID is.
*
* The UUID is generated by using ANDROID_ID as the base key if appropriate,
* falling back on TelephonyManager.getDeviceID() if ANDROID_ID is known to
* be incorrect, and finally falling back on a random UUID that's persisted
* to SharedPreferences if getDeviceID() does not return a usable value.
*
* In some rare circumstances, this ID may change. In particular, if the
* device is factory reset a new device ID may be generated. In addition, if
* a user upgrades their phone from certain buggy implementations of Android
* 2.2 to a newer, non-buggy version of Android, the device ID may change.
* Or, if a user uninstalls your app on a device that has neither a proper
* Android ID nor a Device ID, this ID may change on reinstallation.
*
* Note that if the code falls back on using TelephonyManager.getDeviceId(),
* the resulting ID will NOT change after a factory reset. Something to be
* aware of.
*
* Works around a bug in Android 2.2 for many devices when using ANDROID_ID
* directly.
*
* @see http://code.google.com/p/android/issues/detail?id=10603
*
* @return a UUID that may be used to uniquely identify your device for most
* purposes.
*/
public UUID getDeviceUuid() {
return uuid;
}
}

命令类

Adb

dumpsys

gradle

查看所有任务 包括缓存任务等

1
gradlew tasks --all

清除build文件夹

1
./gradlew clean

编译并安装debug包

1
./gradlew installDebug

调试模式构建并打印堆栈日志

1
./gradlew build --info --debug --stacktrace

强制更新最新依赖,清除构建并构建

1
./gradlew clean build --refresh-dependencies

编译并打Release的包

1
./gradlew assembleRelease

Release模式打包并安装

1
./gradlew installRelease

卸载Release模式包

1
./gradlew uninstallRelease

结合productFlavorsName

1
./gradlew install[productFlavorsName] app:assembleDebug

Release模式 test 渠道打包

1
./gradlew assembleTestRelease

依赖查看

1
./gradlew dependencies

参数

–offline 离线
–daemon 守护进程
–parallel –parallel-threads=N 并行编译
–configure-on-demand 按需编译

Android进程间通信

Binder通信原理

参考链接

Bundle

简单易用,比如Activity、Service、Receiver支持在Intent中传递Bundle数据,只能传输Bundle支持的数据类型,用于四大组件的进程通信

文件共享

不适合高并发的情况,并且无法做到进程间的及时通信,适合无并发情况下,交换简单的数据实时性不高的情况

Socket

参考链接

功能强大,可以通过网络传输字节流,支持一对多并发实时通讯,实现细节有点繁琐,不支持直接的RPC,适用于网络数据交换

Binder

AIDL

参考链接

功能强大,支持一对多并发通信,支持实时通讯,需要处理好线程同步,适用于一对多通信且有RPC需求

Messenger(底层其实是AIDL)

参考链接

支持一对多串行通信,支持实时通讯,不能很好处理高并发情况,不支持RPC,数据通过Message进行传输,因此只能传输Bundle支持的数据类型。适合低并发的一对多及时通信,无RPC需求或无需返回结果的RPC需求

ContentProvider

参考链接

在数据源访问方面功能强大,支持一对多并发数据共享,可通过call方法扩展其他操作,只要提供数据源的crud,适合一对多的进程间数据共享

重学Handler

##引用1:Handler的运行机制

##引用2:Handler实现线程间通信

##引用3:关于Handler的几个问题

##Handle面试问法

##Handle10问

消息发送和接收处理

发送消息:

表象:handler.sendMessasge

本质:最终会调用enqueueMessage方法将消息放到MessageQueue中

处理消息:

表象:handler的handleMessage

本质:Looper通过不断的loop从MessageQueue取出数据,然后通过callback返回给调用方

handler线程通信:

(1)子线程向主线程发送消息:
主线程中创建Handler,然后在子线程里调用主线程的Handler来sendMessage

(2)主线程向子线程中发送消息:
子线程run方法中流程:Looper.prepare()-> 创建子线程的内部的Handler -> Looper.loop(),然后主线程中通过持有子线程的Handler来sendMessage

(3)子线程间发送消息:
A子线程持有B子线程的Handler,然后在A子线程中通过Handler来sendMessage

以上也可以通过持有其他线程的Looper,来创建Handler,进而sendMessage

如何实现线程之间切换

当在A线程中创建handler的时候,同时创建了MessageQueue与Looper,Looper在A线程中调用loop进入一个无限的for循环从MessageQueue中取消息,当B线程调用handler发送一个message的时候,会通过msg.target.dispatchMessage(msg);将message插入到handler对应的MessageQueue中,Looper发现有message插入到MessageQueue中,便取出message执行相应的逻辑,因为Looper.loop()是在A线程中启动的,所以则回到了A线程,达到了从B线程切换到A线程的目的。

总结

(1)handler和looper是唯一映射的关系

(2)一个handler只能拥有一个looper

(3)一个looper只能和一个线程相照应,同时一个looper也对应唯一的一个MessageQueue

(4)一个looper却可以拥有多个handler(因为handler可以通过指定looper来创建)